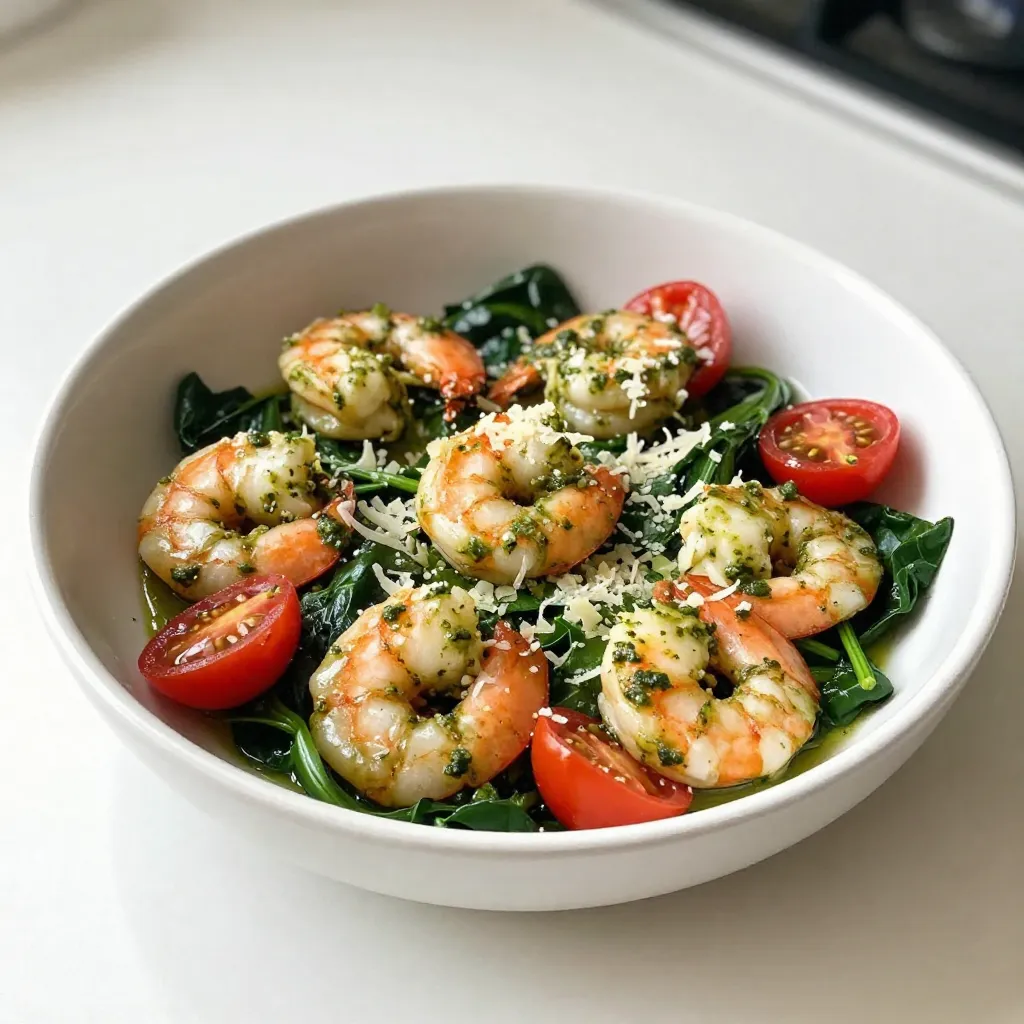
Looking for a quick and tasty dinner? This Pesto Shrimp Skillet checks all the boxes! You can whip up a flavorful dish in just 30 minutes. Featuring juicy shrimp, fresh spinach, and cherry tomatoes, it packs a punch with basil pesto and Parmesan cheese. Whether you’re cooking for one or feeding a crowd, this recipe is a must-try. Let’s dive into the details so you can impress at dinner tonight!
Why I Love This Recipe
- Quick and Easy: This recipe can be prepared in just 20 minutes, making it perfect for busy weeknights or a last-minute dinner party.
- Fresh Ingredients: With vibrant spinach and juicy cherry tomatoes, this dish is not only delicious but also packed with nutrients.
- Flavorful Pesto: The addition of basil pesto elevates the dish, infusing it with aromatic flavors that complement the shrimp beautifully.
- Versatile Serving Options: Enjoy it on its own or over a bed of pasta, giving you flexibility depending on your mood or dietary preferences.
Ingredients
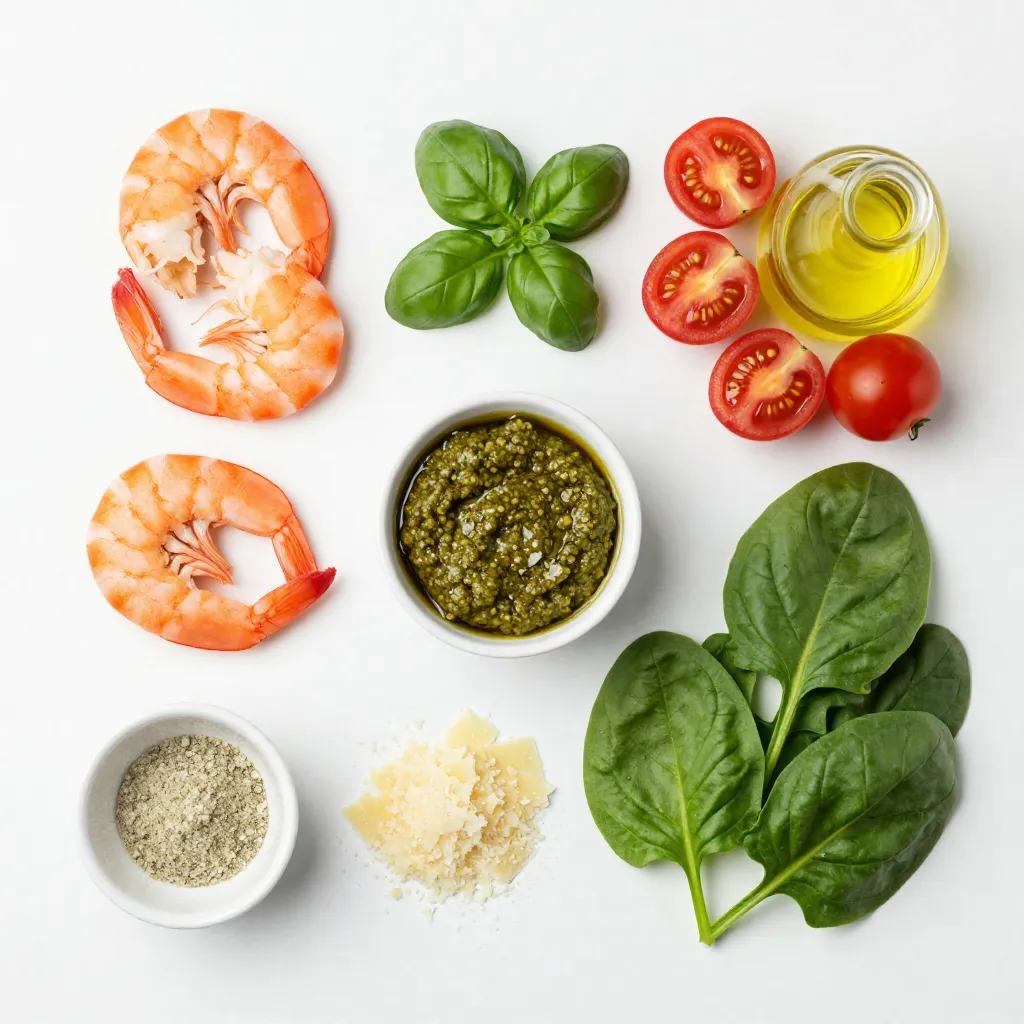
List of Ingredients
– 1 pound large shrimp, peeled and deveined
– 2 tablespoons olive oil
– 3 cups fresh spinach, thoroughly washed
– 1 cup cherry tomatoes, halved
– 1/2 cup basil pesto (store-bought or homemade)
– 1/4 cup freshly grated Parmesan cheese
– 1 teaspoon garlic powder
– Salt and black pepper to taste
– Cooked pasta (for serving, optional)
The ingredients for Pesto Shrimp Skillet are simple yet full of flavor. You start with large shrimp, which give a nice bite. Olive oil adds richness, while spinach and cherry tomatoes bring fresh, bright notes. Pesto ties it all together with its herby essence. For a tasty finish, Parmesan cheese adds a savory touch.
Nutritional Information
This dish is both delicious and nutritious. Each serving has around 350 calories, depending on the pasta you choose. The shrimp provide protein, while spinach offers iron and vitamins.
– Dietary considerations: This dish is gluten-free if you skip the pasta. It’s also low-carb, making it a great choice for many diets.
You can enjoy this meal knowing it is both healthy and satisfying.
Step-by-Step Instructions
Cooking the Shrimp
1. First, heat 2 tablespoons of olive oil in a large skillet over medium heat for about 1 minute.
2. Next, add 1 pound of peeled and deveined shrimp to the skillet.
3. Season the shrimp with 1 teaspoon of garlic powder, salt, and black pepper.
4. Cook the shrimp for 2-3 minutes on each side until they turn pink and opaque.
5. Once cooked, transfer the shrimp to a plate and set aside.
Sautéing Vegetables
1. In the same skillet, add 1 cup of halved cherry tomatoes.
2. Sauté them for about 2 minutes until they soften and release their juices.
3. Then, add 3 cups of fresh spinach to the skillet.
4. Stir gently and cook for another 2-3 minutes until the spinach wilts down completely.
Combining Ingredients
1. Lower the heat to low and return the cooked shrimp to the skillet.
2. Pour in 1/2 cup of basil pesto.
3. Toss everything gently but thoroughly to mix and heat all the ingredients together.
Final Touches
1. Sprinkle 1/4 cup of freshly grated Parmesan cheese over the dish.
2. Mix gently again to incorporate the cheese.
3. Taste the dish and adjust seasoning with more salt and pepper if needed.
Tips & Tricks
Cooking Tips
To tell when shrimp are done, look for a bright pink color. They should also be opaque all the way through. This usually takes about 2-3 minutes per side. Don’t overcook them! Overcooked shrimp turn rubbery and lose their flavor.
For sautéing spinach, use medium heat. Add the spinach to the skillet and stir gently. It will wilt down quickly, usually in 2-3 minutes. This keeps it bright and fresh. If you cook it too long, it may lose its vibrant color.
Presentation Tips
For garnishing, fresh basil leaves add a nice touch. You can also drizzle a bit of olive oil over the top. This not only looks great but adds flavor too.
When serving, you can plate the dish over cooked pasta for a heartier meal. If you want something lighter, serve it alone. Both options are delicious and appealing.
Storage and Reheating Tips
To store leftovers, place them in an airtight container. Keep them in the fridge for up to three days.
For reheating, the best method is using the stove. Gently heat the skillet over low heat. Stir the dish to warm it evenly. You can also use a microwave, but be careful not to overheat it.
Pro Tips
- Freshness is Key: Always use fresh shrimp for the best flavor and texture. Frozen shrimp can be a convenient alternative, but ensure they are properly thawed before cooking.
- Customize Your Pesto: Don’t hesitate to make your own pesto! You can enhance the flavor by adding nuts like walnuts or pine nuts, or even a squeeze of lemon juice for brightness.
- Versatile Veggies: Feel free to add or substitute other vegetables like bell peppers or zucchini. They will add color and additional nutrients to your dish.
- Perfect Pasta Pairing: If serving with pasta, reserve some pasta water before draining. A splash of it can help create a silky sauce when mixed with the pesto and shrimp.
Variations
Ingredient Substitutions
If you want to switch things up, consider using chicken instead of shrimp. Chicken breasts work well and can be cooked in the same way. For a plant-based option, tofu is a great choice. Just make sure to press it first to remove excess water.
If you need a dairy-free option for Parmesan cheese, look for a vegan substitute. Nutritional yeast also adds a cheesy flavor without dairy.
Flavor Enhancements
To boost the taste, add a pinch of red pepper flakes for some heat. You can also mix in fresh herbs like basil or parsley. They bring fresh flavors and bright colors.
You can include other vegetables too. Bell peppers, zucchini, or asparagus work great. Just sauté them along with the cherry tomatoes. They add texture and nutrition to your dish.
Different Serving Ideas
You can serve this dish with various types of pasta. Penne, spaghetti, or even zoodles are tasty options. Each type of pasta will change the dish’s feel.
Another idea is to use this as a salad topping. Just toss some mixed greens in a bowl and add the Pesto Shrimp on top. It makes for a light and refreshing meal.
Storage Info
Short-Term Storage
To store leftovers, let the dish cool down first. Once cooled, place it in an airtight container. It’s best to refrigerate the dish within two hours of cooking. Pesto Shrimp Skillet stays fresh in the fridge for up to three days. When you’re ready to eat, check for any signs of spoilage.
Long-Term Storage
For long-term storage, you can freeze the dish. First, let it cool completely. Then, transfer it to a freezer-safe container. Seal the container tightly to avoid freezer burn. Pesto Shrimp Skillet can last up to three months in the freezer. To thaw, move it to the fridge overnight. When reheating, warm it on the stovetop over low heat. Stir occasionally to ensure even heating. You can also use a microwave, but do so in short bursts to avoid overcooking the shrimp.
FAQs
Can I use frozen shrimp for this recipe?
Yes, you can use frozen shrimp. If you use frozen shrimp, thaw them first. Place them in cold water for about 15 minutes. Once thawed, peel and devein if needed. This step ensures even cooking. Remember to adjust cooking time. Frozen shrimp may take a minute longer to cook than fresh shrimp.
How long does the dish last in the fridge?
Pesto Shrimp Skillet lasts for about three days in the fridge. Store it in an airtight container. Keeping it sealed helps maintain flavor and texture. When you reheat, make sure it’s heated all the way through. This dish is best eaten fresh, but it can still taste great as leftovers.
What type of pasta pairs well with this dish?
For this dish, I recommend using spaghetti or fettuccine. These pasta types hold the sauce well. You can also try penne or linguine for a fun twist. If you want a low-carb option, zucchini noodles work well too. They add a fresh crunch and soak up all the flavors.
This blog post outlined a simple and delicious Pesto Shrimp Skillet recipe. You learned about the key ingredients and their benefits. We discussed step-by-step cooking instructions, tips for perfecting your dish, and variations to keep it exciting.
In conclusion, this meal is quick to make and full of flavor. It’s perfect for busy weeknights or special gatherings. Don’t hesitate to experiment with your favorite ingredients. Enjoy the process and savor your tasty creatio