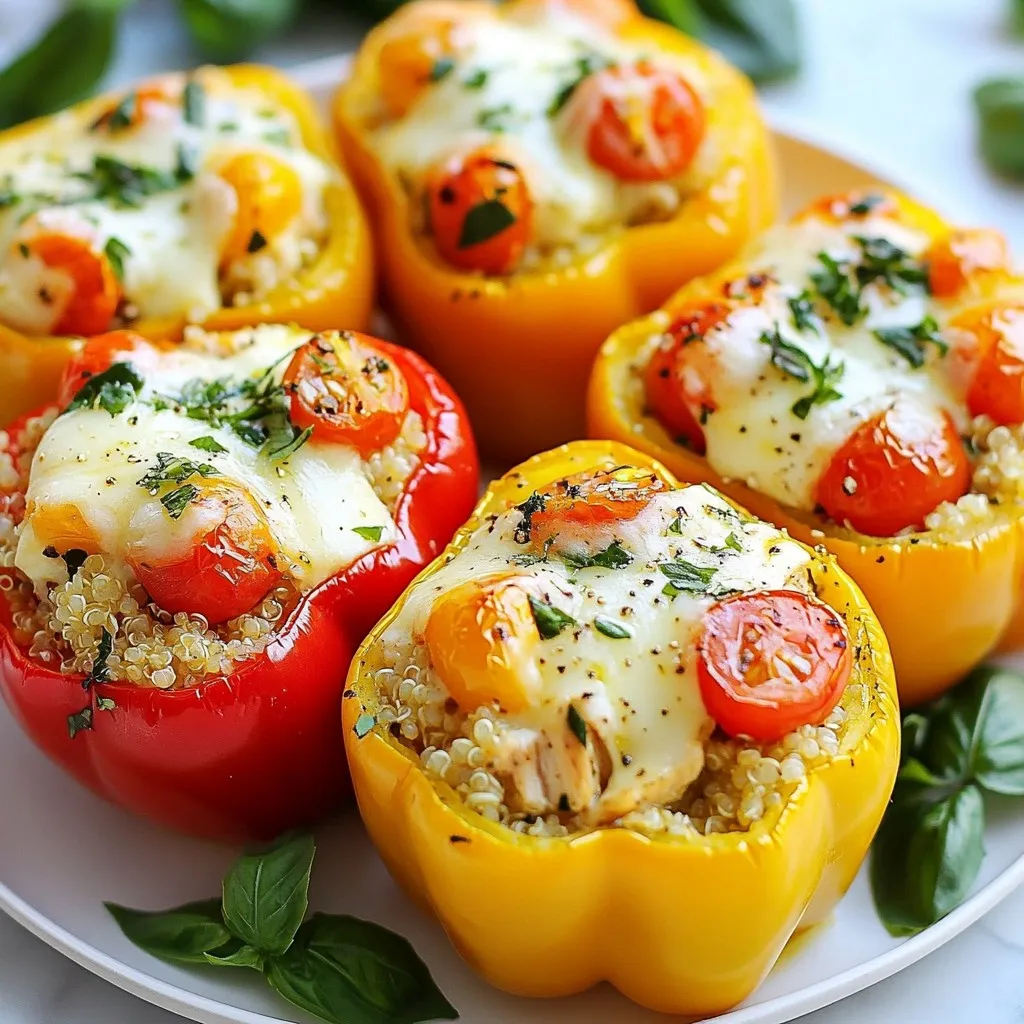
Craving a tasty meal that’s also easy to make? Let me introduce you to pesto chicken stuffed peppers! This colorful dish combines tender peppers with creamy pesto, juicy chicken, and melty cheese. It’s perfect for a quick family dinner or meal prep. Ready to transform simple ingredients into a satisfying meal? Join me as we dive into this simple and delicious recipe that will have everyone asking for seconds!
Why I Love This Recipe
- Flavorful Filling: The combination of pesto, chicken, and mozzarella creates a deliciously rich and savory filling.
- Customizable Ingredients: You can easily swap out ingredients based on your dietary preferences or what you have on hand.
- Healthy and Nutritious: Stuffed peppers are not only filling but also packed with nutrients from the vegetables and protein.
- Perfect for Meal Prep: These stuffed peppers can be made ahead of time and stored for a quick and easy meal during the week.
Ingredients
List of Ingredients
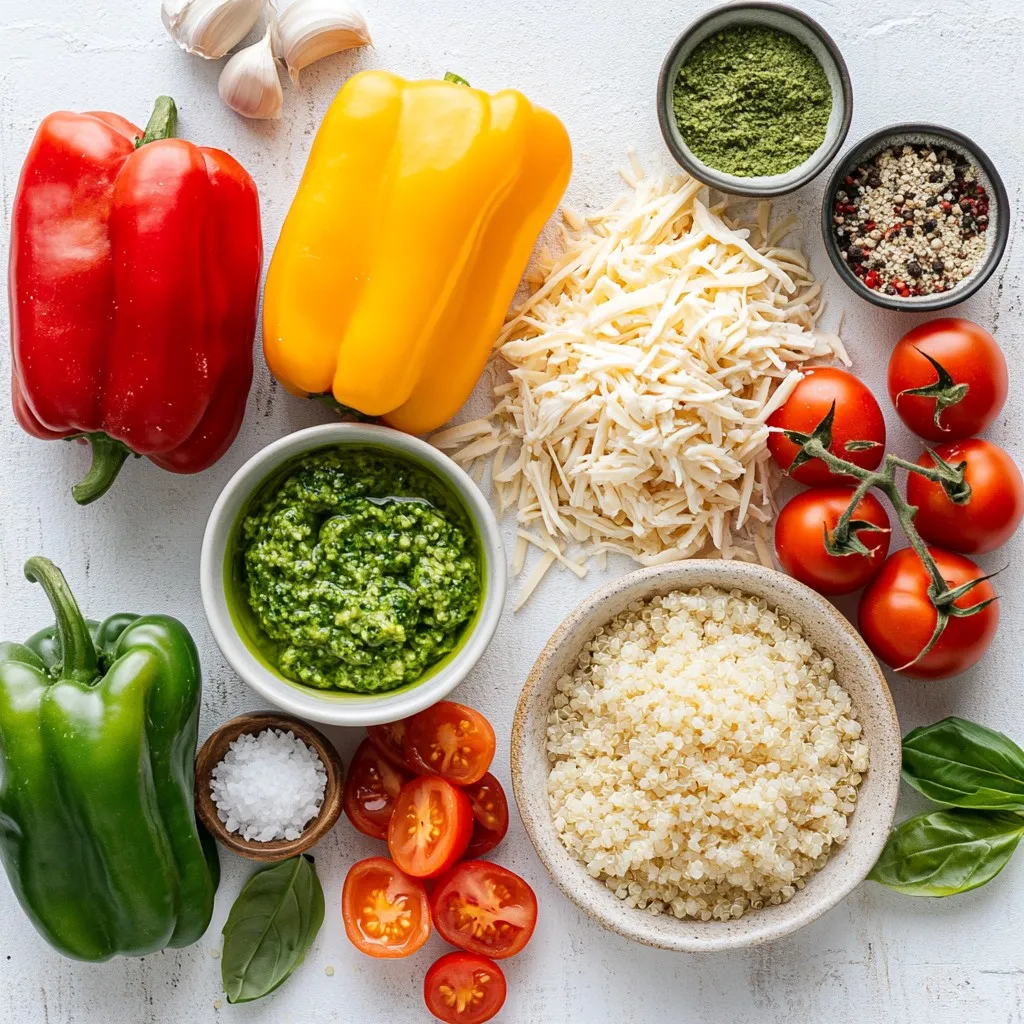
– 4 large bell peppers (any color)
– 2 cups cooked chicken, shredded
– ½ cup basil pesto
– 1 cup cooked quinoa or rice
– 1 cup cherry tomatoes, halved
– 1 cup shredded mozzarella cheese (divided)
– ½ teaspoon garlic powder
– ½ teaspoon onion powder
– Salt and pepper to taste
– Fresh basil leaves for garnish (optional)
To make Pesto Chicken Stuffed Peppers, gather fresh ingredients. Start with bell peppers. Any color works well. I love using bright red or yellow ones for their sweetness.
Next, get shredded chicken. You can use leftover chicken or rotisserie chicken. It saves time and adds great flavor. Pesto adds richness. I prefer basil pesto because it pairs well with chicken.
Quinoa or rice acts as a nice base. Both options give texture. I often use quinoa for more protein. Cherry tomatoes add a burst of freshness. They brighten the dish.
Mozzarella cheese is a must for that cheesy finish. I usually divide it into two portions. Half goes in the filling, and the other half tops the peppers. Garlic powder and onion powder enhance the flavor. Don’t forget salt and pepper for seasoning!
Lastly, fresh basil leaves make a lovely garnish. They add color and freshness right before serving. Enjoy the vibrant flavors of this dish!
Step-by-Step Instructions
Prepping the Peppers
– Preheat your oven to 375°F (190°C).
– Cut the tops off the bell peppers and remove the seeds.
Start by preheating the oven. This makes sure it’s hot and ready for the peppers. Next, take your bell peppers and cut off the tops. Be careful! You want to make a clean cut around the stem. After that, scoop out the seeds and any white bits inside. Stand the peppers upright in a baking dish. This helps them keep their shape while they bake.
Preparing the Filling
– Mix shredded chicken, basil pesto, quinoa or rice, tomatoes, and seasonings.
In a big bowl, combine the shredded chicken and basil pesto. Stir in the cooked quinoa or rice, along with halved cherry tomatoes. Add garlic powder, onion powder, and half of the mozzarella cheese. Season with salt and pepper to taste. Mix everything well until it’s all combined.
Assembling the Stuffed Peppers
– Stuff the peppers with the filling.
– Top with the remaining mozzarella cheese.
Now, it’s time to fill the peppers. Take each one and spoon in the chicken mixture. Press down gently to pack it in. Once they’re full, sprinkle the rest of the mozzarella cheese on top of each pepper for that cheesy goodness.
Baking the Peppers
– Cover with foil and bake for 25 minutes.
– Remove foil and bake for an additional 10-15 minutes.
Cover the baking dish with foil. This helps the peppers cook evenly. Place the dish in the oven and bake for 25 minutes. After that, take off the foil and bake for another 10-15 minutes. You want the peppers to be soft and the cheese to be bubbly and golden. When they’re done, let them cool for a few minutes before serving. Enjoy!
Tips & Tricks
Enhancing Flavor
– Add spices like red pepper flakes for heat.
– Try using feta cheese for a tangy twist.
A dash of smoked paprika can add depth. You can also mix in Italian herbs for more flavor. Don’t forget to taste as you go!
Texture Optimization
To get the perfect tender pepper, bake them covered. This keeps them moist. After 25 minutes, uncover to brown the cheese.
For even cooking, arrange peppers in a single layer. Avoid crowding them in the pan. This helps them cook uniformly.
Serving Suggestions
Pair your stuffed peppers with a side salad for crunch. Garlic bread also works well for a hearty meal.
Garnish with fresh basil leaves or a drizzle of balsamic glaze. This adds flavor and makes your dish look beautiful!
Pro Tips
- Choose Colorful Peppers: Using a mix of colorful bell peppers not only makes the dish visually appealing but also adds a variety of flavors to each bite.
- Customize Fillings: Feel free to add other vegetables like spinach or zucchini to the filling for added nutrition and flavor.
- Make Ahead: Prepare the stuffed peppers ahead of time and store them in the fridge for up to 24 hours before baking for a quick weeknight meal.
- Experiment with Cheese: Try using different types of cheese such as feta, goat cheese, or a spicy pepper jack for a unique twist on the classic recipe.
Variations
Alternative Ingredients
You can swap chicken for tofu, beans, or lentils for a tasty vegetarian dish. These options still give you protein and flavor. You can also use different cheeses. Try feta for a tangy kick or cheddar for a bold taste. For grains, quinoa works well, but you can use brown rice or couscous too. Each grain adds its own texture and flavor.
Cooking Methods
For a quick meal, use an air fryer. Set it to 375°F (190°C) and cook for about 15-20 minutes. The air fryer crisps the peppers and melts the cheese nicely. In summer, grilling the stuffed peppers is fun. Wrap them in foil and place them on the grill. Cook for about 25 minutes for a smoky twist.
Flavor Variations
Experiment with different pesto flavors. Try sun-dried tomato pesto for a rich taste or spinach pesto for a fresh twist. You can also add spices for heat. Cayenne or paprika gives a nice kick, while Italian herbs like oregano or thyme can enhance the flavor profile. Mix and match to find your favorite combination!
Storage Info
Leftover Storage
To store leftover pesto chicken stuffed peppers, let them cool first. Place them in an airtight container. Make sure the lid is tight to keep out air. These leftovers will last about 3 to 4 days in the fridge.
When you reheat them, check if they are warm all the way through. You can use the microwave or oven for this. If using the oven, cover them with foil to keep them moist.
Freezing Instructions
You can freeze these stuffed peppers before or after baking. If you freeze them before baking, wrap each pepper tightly in plastic wrap. Then, place them in a freezer bag. They can last up to 3 months this way.
If you bake them first, let them cool completely. Then, use the same wrapping method. To thaw, place the frozen peppers in the fridge overnight.
To reheat frozen stuffed peppers, bake them in the oven at 375°F (190°C). This should take about 30 to 35 minutes. Check to make sure they are hot inside before serving.
FAQs
Can I use raw chicken?
Yes, you can use raw chicken. Just make sure to cook it fully. This means baking the stuffed peppers for about 40-45 minutes instead of 25 minutes. Use a meat thermometer to check the chicken’s temperature. It should reach 165°F (75°C) to be safe to eat.
What can I substitute for quinoa?
You have many options if you want to swap out quinoa. Brown rice or white rice works well too. You can also try couscous or farro for a different texture. If you’re looking for a veggie option, finely chopped cauliflower or zucchini can be great, too.
How do I know when the peppers are done?
Check the peppers for softness. They should feel tender when you poke them with a fork. The cheese should be melted and bubbly on top. A nice golden color means they are perfectly baked.
This post outlined how to make delicious stuffed peppers. We covered ingredients, steps, tips, and variations. You can use many options for flavors and fillings. Feel free to make it your own. Stuffed peppers are simple, tasty, and great for any meal. I hope you enjoy this recipe and make it again. Happy cookin