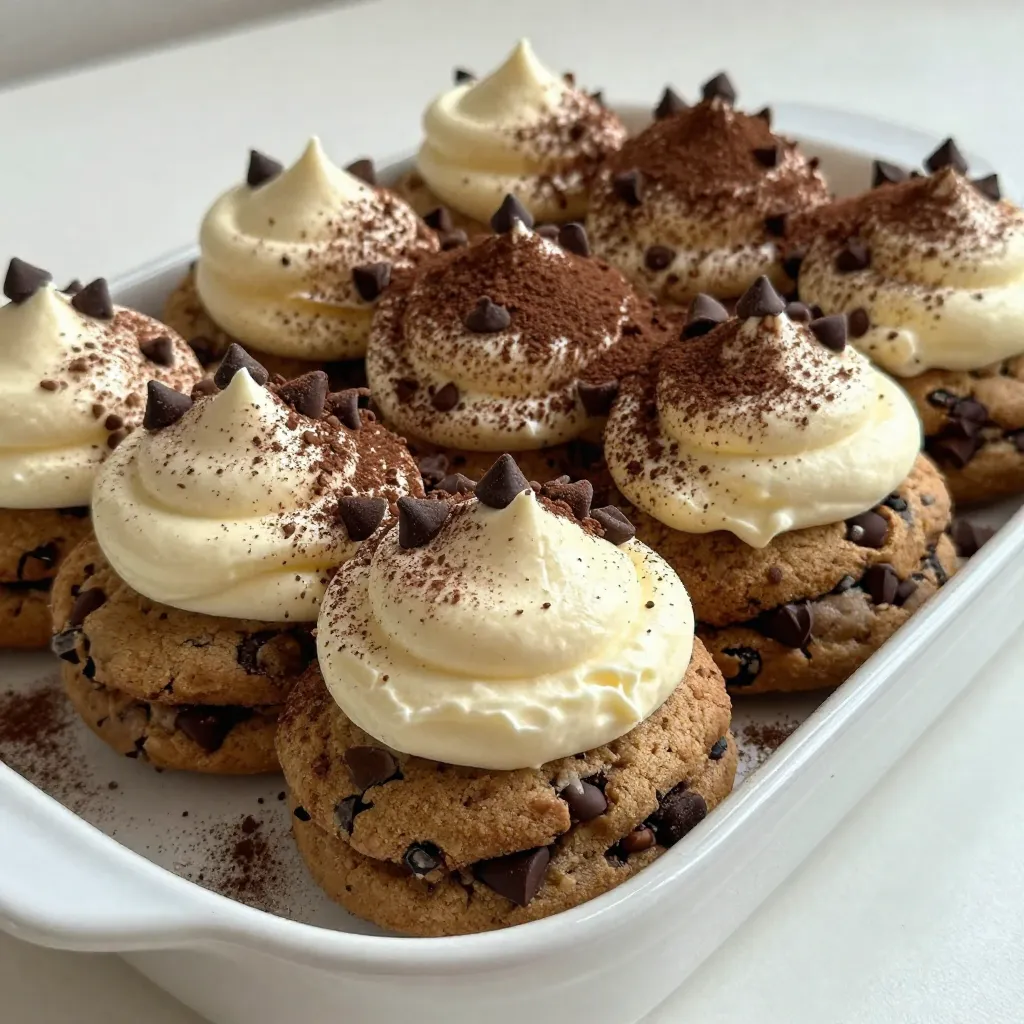
If you’re in the mood for a sweet treat without the fuss of baking, get ready for this Mocha Chip Icebox Cake! This delightful no-bake dessert layers rich coffee flavor, creamy whipped topping, and crunchy chocolate chip cookies. You’ll impress your friends and family with a dessert that’s easy to make and absolutely delicious. Let’s dive into the world of chocolatey, coffee goodness and create something special together!
Why I Love This Recipe
- Rich Chocolate Flavor: This cake combines the deep, rich flavors of chocolate and coffee, creating a decadent dessert that satisfies any sweet tooth.
- No-Bake Convenience: As an icebox cake, there’s no baking required, making it super easy and perfect for warm days or last-minute gatherings.
- Layered Texture: The combination of creamy whipped cream and soft cookies creates a delightful texture that melts in your mouth.
- Customizable: This recipe allows for variations; feel free to add your favorite toppings or use different cookie flavors to make it your own!
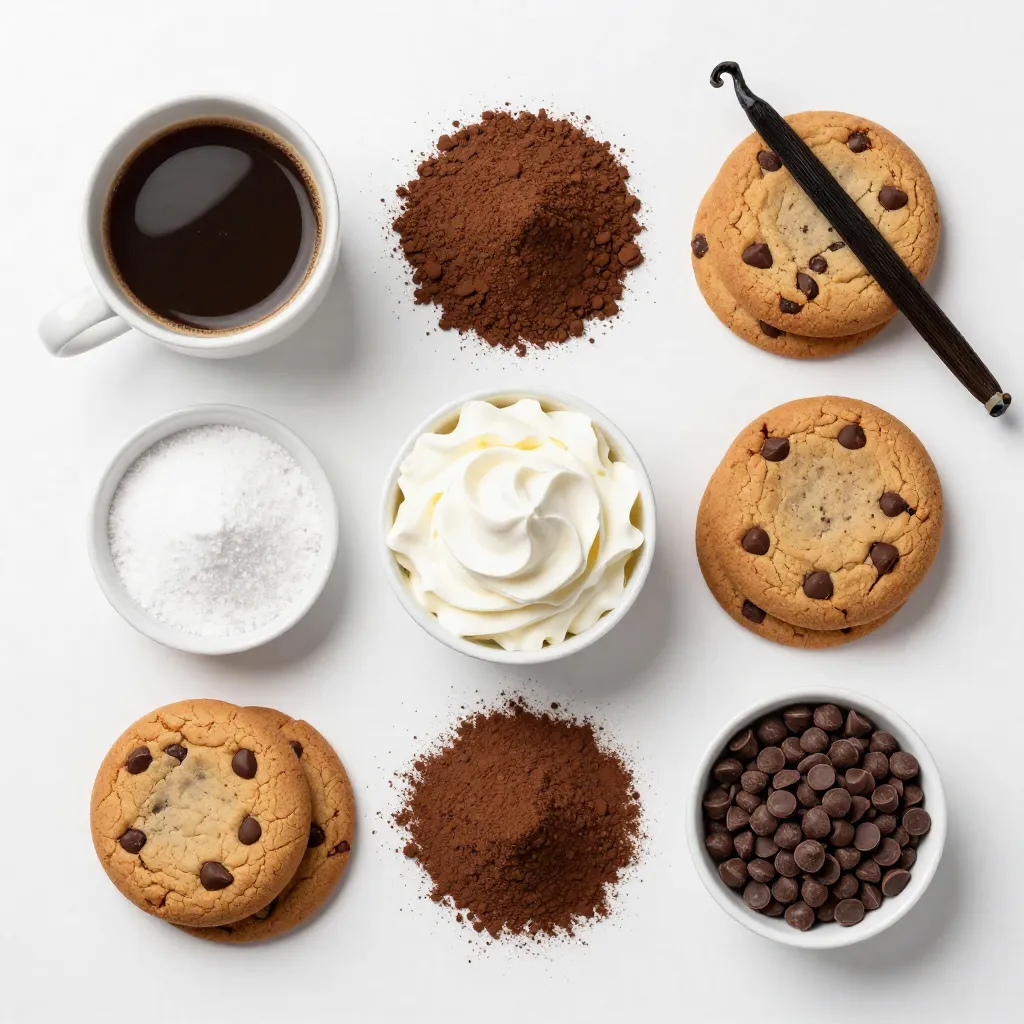
Ingredients
Key Ingredients for Mocha Chip Icebox Cake
– 1 cup strong brewed coffee, cooled to room temperature
– 2 tablespoons unsweetened cocoa powder
– 1 cup heavy whipping cream
– ½ cup powdered sugar
– 1 teaspoon pure vanilla extract
– 2 cups chocolate chip cookies (store-bought or homemade)
– 1 cup mini chocolate chips for layering
– Unsweetened cocoa powder for dusting (optional)
The main star of this dessert is the coffee. It gives a rich flavor. Use strong brewed coffee for the best taste. The unsweetened cocoa powder adds depth and a hint of chocolate. Heavy whipping cream is key for a fluffy texture. It helps to create the creamy layers we love. The powdered sugar sweetens the cream without overpowering it. Pure vanilla extract adds warmth and enhances the flavors.
Chocolate chip cookies are the base of the cake. You can use store-bought cookies for ease or make your own for a personal touch. Mini chocolate chips add extra crunch and sweetness between the layers. Lastly, you can dust the top with cocoa powder for a beautiful finish. This adds a touch of elegance and a hint of extra chocolate flavor.
Each ingredient plays a role in making this cake delightful. They work together to create a sweet, layered treat that is easy to love.
Step-by-Step Instructions
Preparing the Coffee Mixture
To start, grab a small bowl. Combine the cooled brewed coffee with the cocoa powder. Mix well until the cocoa powder dissolves fully. This coffee mixture adds rich flavor to our cake. Once mixed, set it aside. Let it rest for a moment while you prepare the next steps.
Whipping the Cream
Now, take a large mixing bowl and pour in the heavy cream. Use an electric mixer on medium speed to whip the cream. As it thickens, add the powdered sugar and vanilla extract. Keep whipping until you see soft peaks form. Be careful not to overwhip! You want a smooth and creamy texture for the cake.
Assembling the Cake
Let’s build this cake! First, take a chocolate chip cookie and dip it quickly into the coffee mixture. Let any extra coffee drip off. You want the cookie moistened, but not soggy. Place the dipped cookie flat in a 9×9 inch dish. This will be your first layer.
Next, spread a generous layer of whipped cream over the cookie. Sprinkle mini chocolate chips on top for sweetness. Repeat this process. Layer dipped cookies, whipped cream, and chocolate chips until you use all ingredients.
For the top layer, make sure to spread whipped cream smoothly. This will give your cake a nice finish. Cover the dish tightly with plastic wrap. Chill it in the fridge for at least 4 hours. For the best flavor, let it sit overnight.
When you’re ready to serve, dust the top lightly with cocoa powder. This adds a nice touch and a bit of extra flavor. Enjoy your delicious Mocha Chip Icebox Cake!
Tips & Tricks
Perfecting the Whipped Cream
To make soft whipped cream, start with cold heavy cream. Use a clean bowl and beaters. Mix on medium speed until it thickens. Slowly add the powdered sugar and vanilla. Stop mixing when you see soft peaks. If you whip too long, the cream can turn grainy.
Common mistakes include using warm cream or overwhipping. Warm cream won’t whip well. Overwhipping makes the cream lumpy. Aim for a smooth, fluffy texture.
Assembling Techniques
For even layers, dip each cookie quickly in the coffee mixture. Let excess liquid drip off. Place the cookie flat at the bottom of your dish. Spread whipped cream evenly on top. Sprinkle mini chocolate chips for extra crunch. Repeat this process until you run out of ingredients.
Try to make the top layer smooth. It looks better and helps with serving. Once chilled, cut into neat squares for a lovely presentation.
Time-Saving Tips
You can save time by using store-bought chocolate chip cookies. They work just as well in this recipe. Also, you can make the cake ahead of time. It tastes best after chilling overnight. The flavors blend nicely, and the cookies soften perfectly.
Pro Tips
- Use Fresh Coffee: For the best flavor, use freshly brewed coffee. The aroma and taste of fresh coffee will enhance the overall experience of your icebox cake.
- Whip Cream to Perfection: Be careful not to overwhip the cream. Stop whipping as soon as soft peaks form for a smooth and creamy texture that complements the cake.
- Layering Technique: Ensure each cookie is evenly dipped in the coffee-cocoa mixture to avoid sogginess. This helps maintain a balanced texture throughout the layers.
- Chill Overnight: While 4 hours is the minimum chill time, letting the cake sit overnight allows the flavors to meld beautifully, resulting in a more delicious dessert.
Variations
Flavor Modifications
You can change the flavor of your Mocha Chip Icebox Cake easily. First, try using different flavored coffee. Hazelnut or vanilla coffee adds a fun twist. You can also mix in flavored extracts. Almond or mint extract gives the cake a unique touch. Just use a little, so it doesn’t overpower the mocha taste.
Cookie Substitutions
If you want to switch things up, consider using different cookies. Vanilla wafers or graham crackers work well. They add a nice crunch. You can also make your own chocolate chip cookies. Use this simple recipe:
– 1 cup all-purpose flour
– 1/2 teaspoon baking soda
– 1/4 cup unsalted butter, softened
– 1/4 cup brown sugar
– 1/4 cup granulated sugar
– 1 egg
– 1/2 teaspoon vanilla extract
– 1/2 cup chocolate chips
Mix the dry and wet ingredients separately, then combine. Bake at 350°F for about 10-12 minutes. Let them cool before using in your cake.
Dairy-Free or Vegan Options
For a dairy-free or vegan Mocha Chip Icebox Cake, swap the heavy cream. Use coconut cream or a vegan whipped topping instead. For the chocolate cookies, look for vegan brands. You can also make your own vegan cookies with these ingredients:
– 1 cup all-purpose flour
– 1/2 teaspoon baking soda
– 1/4 cup coconut oil, melted
– 1/4 cup brown sugar
– 1/4 cup maple syrup
– 1/2 teaspoon vanilla extract
– 1/2 cup dairy-free chocolate chips
Mix the ingredients and bake at 350°F for 10-12 minutes. Enjoy your delicious, vegan treat!
Storage Info
How to Store Leftovers
To keep your Mocha Chip Icebox Cake fresh, cover it tightly with plastic wrap. You can also use a lid if your dish has one. This helps prevent air from drying it out. For the best taste, eat the cake within 3 to 5 days. The flavor is best just after chilling.
Freezing the Cake
If you want to save some for later, you can freeze it. First, cut the cake into squares for easy serving. Wrap each piece in plastic wrap, then place them in a freezer-safe bag. This keeps them fresh for up to 2 months. To thaw, take a piece out and place it in the fridge overnight. This method helps maintain the texture and flavor.
Shelf Life Considerations
In the fridge, the Mocha Chip Icebox Cake lasts about 3 to 5 days. Look for signs of spoilage, such as an off smell or changes in texture. If you see any mold, it’s best to throw it away. Always trust your senses to guide you on freshness.
FAQs
How long does Mocha Chip Icebox Cake need to chill?
Mocha Chip Icebox Cake needs to chill for at least 4 hours. This time allows the cookies to soak in the coffee mixture. For the best taste and texture, I suggest chilling it overnight. The flavors blend well, and the dessert becomes rich and creamy.
Can I use instant coffee for this recipe?
Yes, you can use instant coffee. However, brewed coffee gives a richer flavor. Instant coffee might not dissolve as well in the cocoa mix. If you choose instant coffee, use the same amount. Just mix it with hot water to dissolve before adding it to the cocoa powder.
What is the best way to serve Mocha Chip Icebox Cake?
To serve the cake, slice it into neat squares. Place each piece on a plate. Top it with a dollop of whipped cream. You can also sprinkle a few mini chocolate chips on top for a nice touch. This simple presentation makes it look great for guests!
The Mocha Chip Icebox Cake is a delightful treat you can easily create. You mix strong coffee with cocoa, whip cream to soft peaks, and layer it all with cookies. Remember to use tips for the perfect texture and even layers. Feel free to try different flavors or cookies for your own twist. Store leftovers properly to enjoy later. With this guide, you have the tools to make a delicious cake that everyone will love. Enjoy every bite and get ready to impress your friend