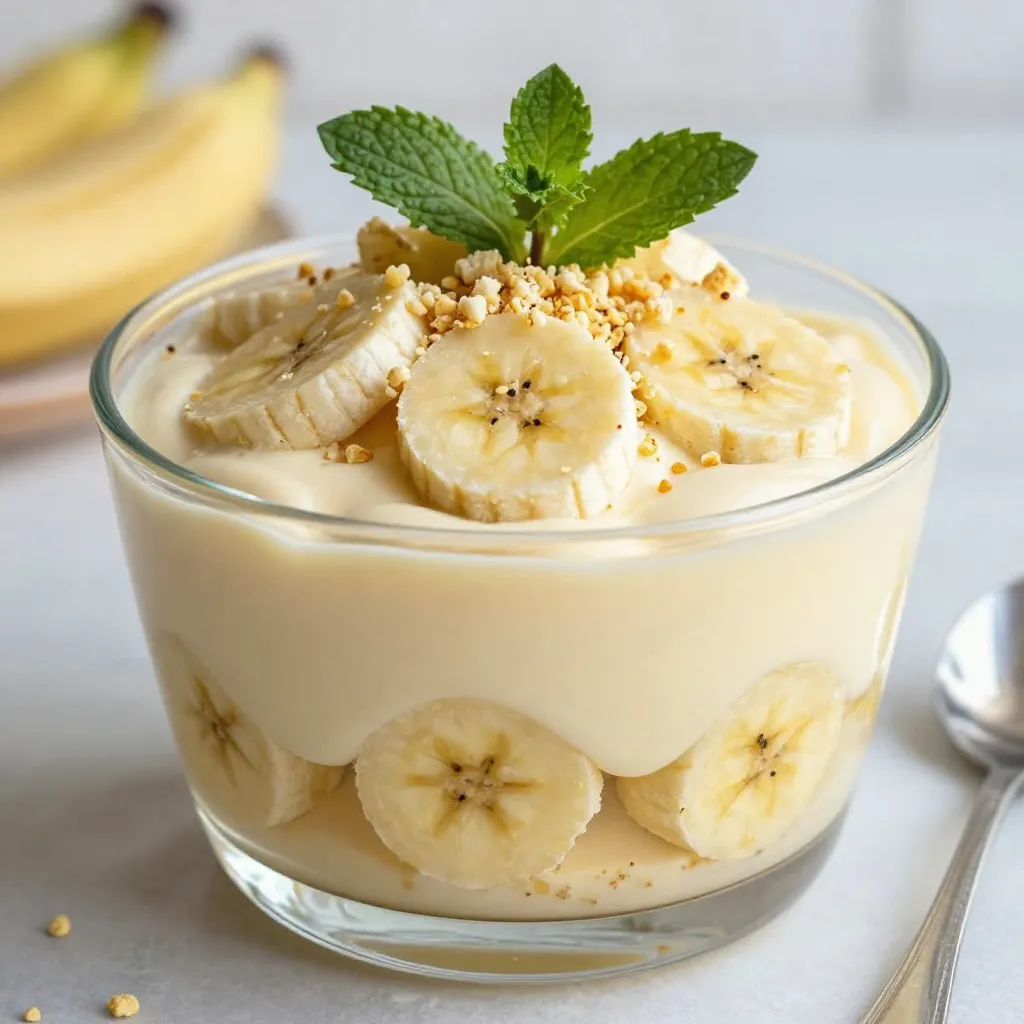
Are you ready to indulge in a creamy and delicious classic banana pudding? This timeless dessert combines ripe bananas, rich vanilla pudding, and crunchy vanilla wafers for a treat that’s hard to resist. In this article, I’ll guide you through each step to create this delicious delight. Whether you’re a seasoned chef or a newbie, you’ll find simple tips, clever variations, and storage advice. Let’s make your dessert dreams come true!
Why I Love This Recipe
- Simple and Quick: This recipe comes together in just 20 minutes, making it perfect for last-minute gatherings or sweet cravings.
- Layered Delight: The beautiful layers of vanilla wafers, creamy pudding, and fresh bananas create a stunning presentation that impresses everyone.
- Classic Flavor: Banana pudding is a timeless dessert that brings nostalgia and comfort, reminding us of family gatherings and warm memories.
- Customizable: This recipe allows for variations; feel free to add your favorite toppings or even swap in different fruits for a unique twist.
Ingredients
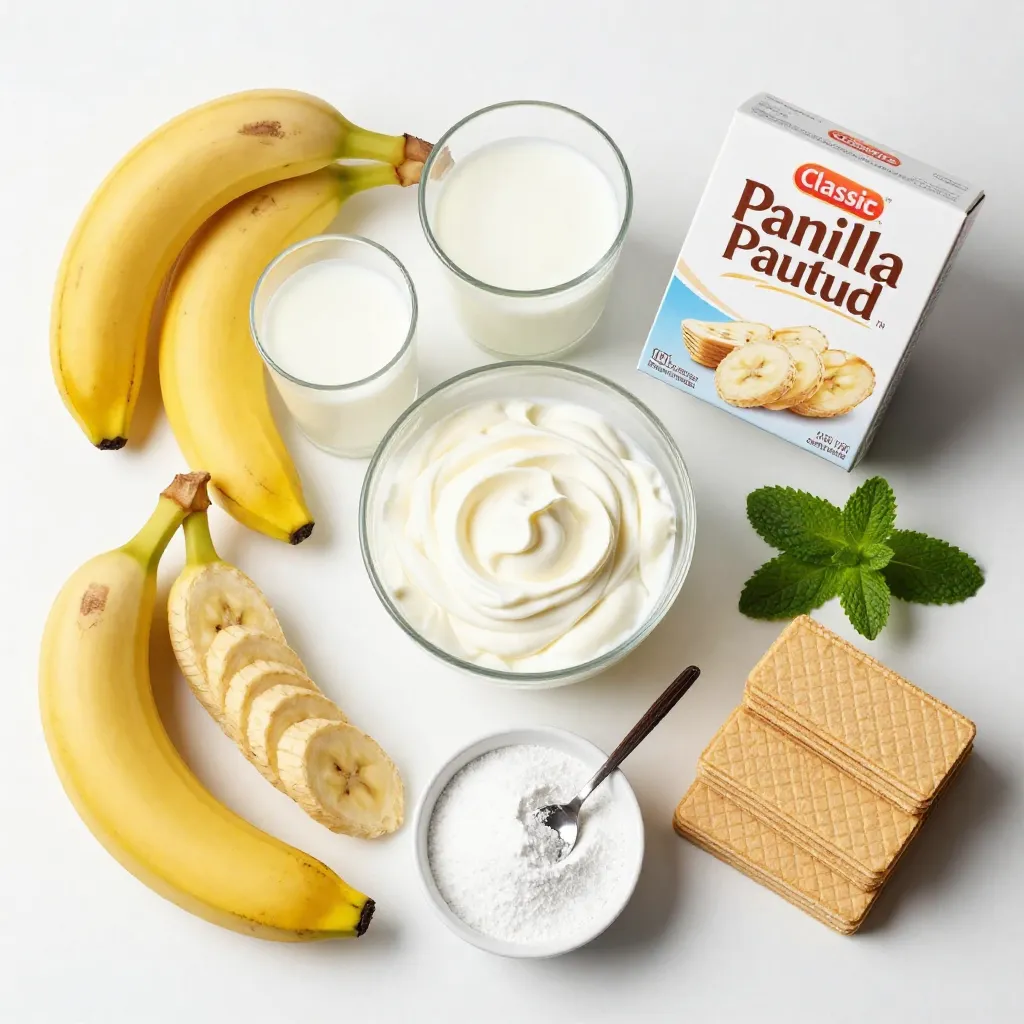
List of Ingredients
– 4 ripe bananas, sliced into rounds
– 1 box (3.4 oz) vanilla instant pudding mix
– 2 cups cold milk
– 1 cup heavy whipping cream
– 1/2 cup powdered sugar
– 1 teaspoon pure vanilla extract
– 1 box (12 oz) vanilla wafers
– Fresh mint leaves for garnish (optional)
Classic banana pudding needs fresh ingredients. Ripe bananas bring sweetness and flavor. I love using a good vanilla instant pudding mix; it makes things easy and quick. Cold milk is key for mixing the pudding. Heavy whipping cream adds a rich texture. Powdered sugar sweetens the cream while pure vanilla extract enhances the taste.
Don’t forget the vanilla wafers! They provide crunch and balance the creaminess. If you want, fresh mint leaves make a pretty garnish. They add a pop of color. All these ingredients come together to create a creamy and delicious delight that feels special.
Step-by-Step Instructions
Preparing the Pudding Mix
First, grab a large bowl. Add the vanilla instant pudding mix and cold milk. Whisk them together for about 2-3 minutes. You want the mix to thicken nicely. Once it has thickened, set it aside. This step is crucial for a smooth pudding base.
Whipping the Cream
Next, take another bowl and pour in the heavy whipping cream. Add the powdered sugar and pure vanilla extract. Use an electric mixer to whip it up. You should see soft peaks forming. This light and fluffy cream will make your pudding even better.
Assembling the Pudding
Now comes the fun part! Get a trifle dish or some clear cups. Start by layering your ingredients. Place a layer of vanilla wafers at the bottom. Next, add a layer of the pudding mix, followed by a layer of sliced bananas. Repeat these layers until you run out of ingredients. Make sure the top layer is pudding.
For a nice finish, crush a few vanilla wafers and sprinkle them on top. Cover your dish with plastic wrap, and pop it in the fridge. Let it chill for at least 4 hours, or overnight if you can wait. This helps the flavors blend and the wafers soften. Before serving, add fresh mint leaves if you want a pop of color. Enjoy your creamy and delicious banana pudding!
Tips & Tricks
Perfecting the Creaminess
To make your banana pudding super creamy, you need to fold the whipped cream right. Start by adding a scoop of whipped cream to the pudding. Use a spatula to gently mix. Do this in a circular motion from the bottom up. This keeps air in and makes it light. If you stir too hard, you will lose that air. Keep folding until the cream is fully mixed.
Serving Suggestions
Make your banana pudding look great when you serve it. Use clear glass cups to show off the layers. This way, people can see the bananas, pudding, and wafers. For a fresh touch, add mint leaves on top. This not only looks nice but also adds a hint of flavor.
Common Mistakes to Avoid
One mistake is overmixing the pudding. Once it thickens, stop whisking. Overmixing makes it grainy. Another mistake is not layering right. Start with wafers, then pudding, and bananas. If you don’t layer correctly, it can look messy. Follow the steps carefully for that perfect look.
Pro Tips
- Choose Ripe Bananas: Ensure your bananas are perfectly ripe for the best flavor and creaminess in your pudding. Look for bananas with a few brown spots for optimal sweetness.
- Chill Your Bowl: For an even fluffier whipped cream, chill your mixing bowl and beaters in the refrigerator before whipping. Cold equipment helps to stabilize the cream.
- Layer Strategically: When layering, start with a layer of wafers at the bottom to prevent sogginess from the pudding. This creates a solid base for your dessert.
- Rest for Best Results: Allow your banana pudding to set in the refrigerator for at least 4 hours, or overnight if possible. This lets the flavors meld and the wafers soften beautifully.
Variations
Adding Different Flavors
You can make classic banana pudding even more exciting. Try these two fun flavors:
– Chocolate banana pudding: Just add some cocoa powder to the pudding mix. Use about 1/4 cup for a rich chocolate taste. Mix it with the cold milk before whisking. Layer it with bananas and wafers as usual.
– Coconut banana pudding: Swap some milk for coconut milk. Use about one cup of coconut milk. This gives a tropical twist. You can also add shredded coconut for extra texture.
Topping Alternatives
The topping can change your dessert’s look and taste. Here are some options:
– Meringue topping options: You can make a light meringue. Just whip egg whites with sugar until they form stiff peaks. Spread it over the top and bake until golden.
– Use of whipped topping instead of whipped cream: If you want a lighter version, use whipped topping. It saves time and still tastes great. Just fold it into your pudding mixture.
Ingredient Substitutions
Sometimes you need to change things up. Here are some swaps:
– Dairy-free options: Use almond milk or oat milk instead of regular milk. For the cream, try coconut cream. These options keep the dish creamy without dairy.
– Healthier sugar alternatives: You can use honey or maple syrup instead of powdered sugar. This change adds flavor while cutting refined sugar. Adjust the amount to taste.
These variations let you customize your banana pudding. Enjoy exploring new flavors!
Storage Info
Refrigeration Guidelines
To keep your classic banana pudding fresh, store it in the fridge. First, cover it with plastic wrap or a lid. This prevents the pudding from absorbing other odors. Leftovers can last for about 3 to 4 days in the fridge. The bananas may brown, but the pudding will still taste great. If you want the best flavor, enjoy it within the first two days.
Freezing Recommendations
Can you freeze banana pudding? Yes, but it may change the texture. The whipped cream can become grainy after thawing. If you choose to freeze it, place it in an airtight container. Make sure to leave some space at the top for expansion. When you’re ready to eat it, defrost the pudding in the fridge overnight. Avoid thawing it at room temperature to keep it safe and tasty.
FAQs
What is classic banana pudding made of?
Classic banana pudding has simple yet delicious ingredients. Here’s what you need:
– 4 ripe bananas, sliced into rounds
– 1 box (3.4 oz) vanilla instant pudding mix
– 2 cups cold milk
– 1 cup heavy whipping cream
– 1/2 cup powdered sugar
– 1 teaspoon pure vanilla extract
– 1 box (12 oz) vanilla wafers
– Fresh mint leaves for garnish (optional)
These ingredients come together to create a creamy and sweet treat. The bananas add natural sweetness, while the vanilla wafers provide a nice crunch.
How long does banana pudding last in the fridge?
Banana pudding can last in the fridge for about 3 to 4 days. For the best taste, cover it tightly with plastic wrap or a lid. Keeping it sealed helps it stay fresh. As time passes, the bananas may brown and the wafers will soften. So, it’s best to enjoy it within a few days.
Can I use ripe bananas for banana pudding?
Yes, you can use ripe bananas for banana pudding. In fact, ripe bananas are perfect because they taste sweeter. They also mash easily and blend well with the pudding. Look for bananas that have a few brown spots for the best flavor. This will make your pudding even more delicious!
In this post, we covered the key ingredients and steps to make banana pudding. You learned how to prepare the pudding, whip the cream, and layer everything correctly. We shared tips for perfect creaminess and common mistakes to avoid. Variations and storage tips were also discussed.
Banana pudding is simple yet versatile. Enjoy customizing it to suit your taste. Whether you stick to the classic or try new flavors, it’s a treat to savor. Always remember to store it properly for the best results. Enjoy your sweet creatio