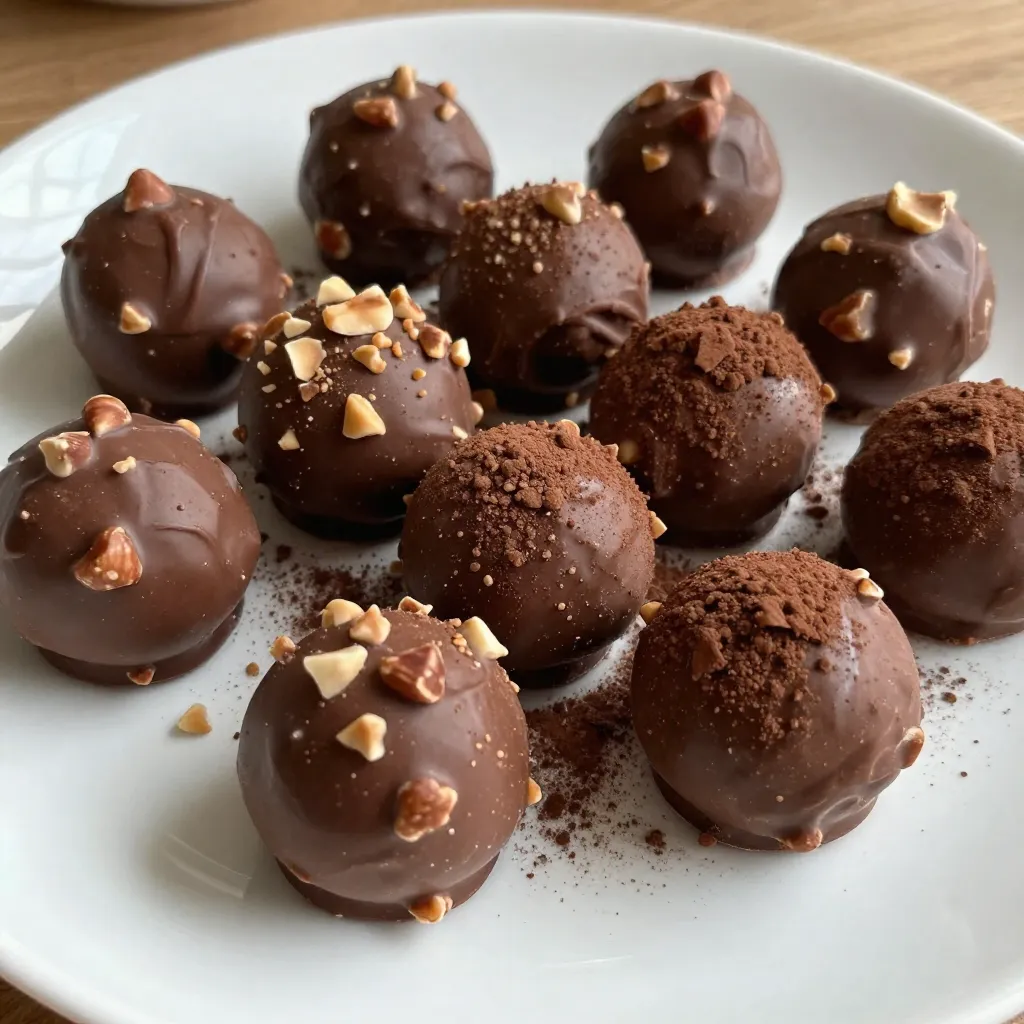
Indulge your sweet tooth with rich and creamy Chocolate Hazelnut Truffles! These bite-sized treats blend dark chocolate, creamy hazelnut spread, and a touch of vanilla for a decadent experience. In just a few easy steps, you can create these delightful morsels that impress guests and satisfy cravings. Ready to dive into the world of truffle-making? Let’s explore ingredients, instructions, and tips to make your truffles shine!
Why I Love This Recipe
- Indulgent Flavor: The rich combination of dark chocolate and hazelnut spread creates a decadent treat that is simply irresistible.
- Easy to Make: With minimal ingredients and straightforward steps, this recipe is perfect for both beginners and experienced bakers.
- Customizable Coatings: Rolling the truffles in toasted hazelnuts or cocoa powder allows for creative variations and personalized flavors.
- Perfect for Gifting: These truffles make for an elegant and thoughtful homemade gift, sure to impress friends and family.
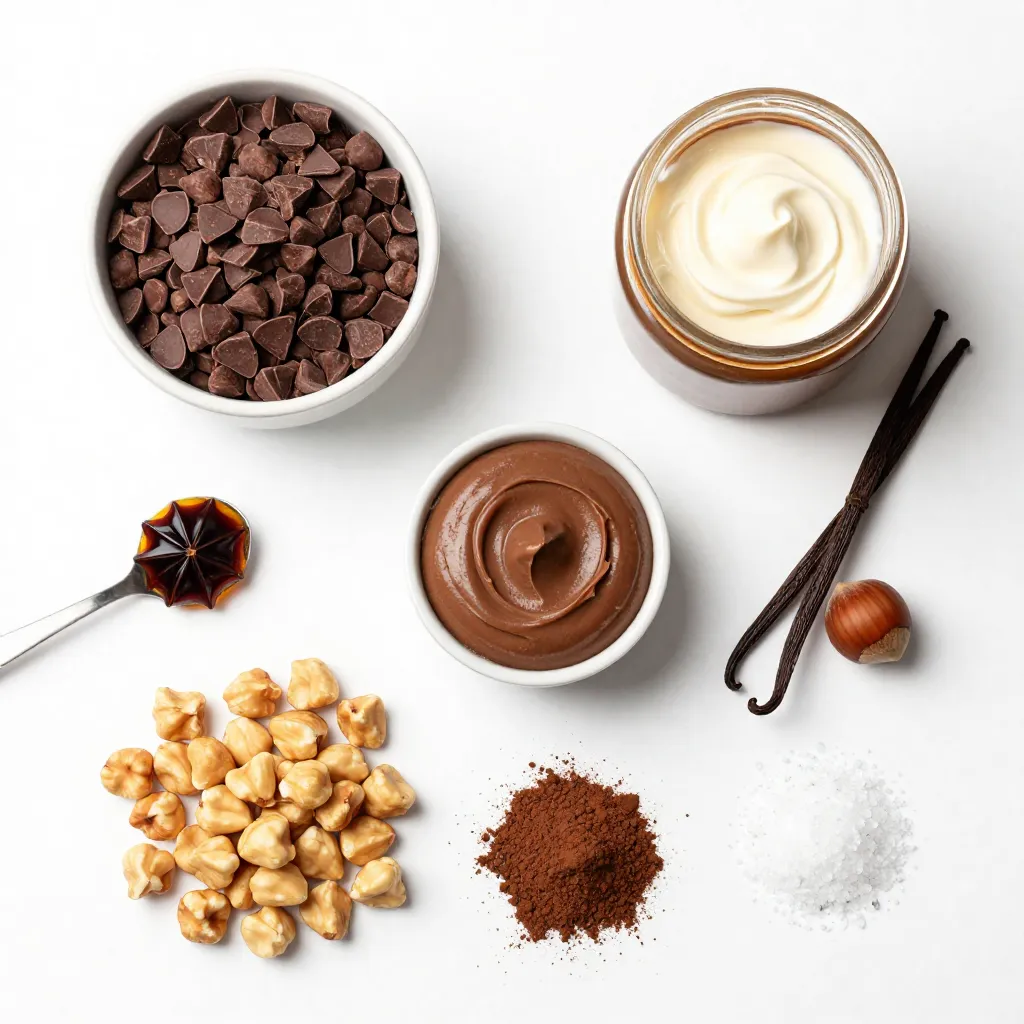
Ingredients
Chocolate Components
– 1 cup dark chocolate chips (70% cocoa)
– 1/2 cup heavy cream
– 1/4 cup hazelnut spread (like Nutella)
– 1 teaspoon pure vanilla extract
Coating Ingredients
– 1 cup finely chopped toasted hazelnuts
– Cocoa powder (for dusting)
– A pinch of flaky sea salt
Serving Size and Preparation Time
– Prep time: 20 minutes
– Total time: 2 hours 20 minutes (including chilling)
– Number of servings: Approximately 12 truffles
To make chocolate hazelnut truffles, gather all these ingredients. The dark chocolate chips provide rich flavor. Heavy cream adds creaminess. Hazelnut spread gives a sweet nutty taste. Vanilla extract enhances all the flavors.
For coating, finely chopped toasted hazelnuts create a crunchy texture. Cocoa powder adds a dusting of chocolatey goodness. The flaky sea salt balances the sweetness and adds depth.
You can prepare this treat in about 20 minutes. However, the truffles need chilling time, so plan for a total of 2 hours and 20 minutes. You’ll have around 12 truffles to enjoy or share with friends.
Step-by-Step Instructions
Heating the Cream
Start with a small saucepan. Pour in 1/2 cup of heavy cream.
Heat it over medium heat. Watch it closely. You want it to simmer, not boil. Remove it from the heat as soon as you see steam. This keeps the cream from scorching.
Preparing the Ganache
Next, take a heatproof bowl. Add 1 cup of dark chocolate chips and a pinch of flaky sea salt. Once the cream is ready, pour it over the chocolate chips. Let it sit for 2-3 minutes. This time allows the heat to melt the chocolate. After waiting, stir with a spatula. Mix until you have a smooth, silky ganache. Then, add 1/4 cup of hazelnut spread and 1 teaspoon of pure vanilla extract. Stir again until everything is smooth and well combined.
Forming the Truffles
Cover the bowl with plastic wrap. Place it in the fridge for 1-2 hours. This chilling time helps the ganache firm up. When it’s ready, use a melon baller or a teaspoon. Scoop out small portions of the ganache. Roll each portion between your palms to form balls. If the ganache sticks to your hands, dust them lightly with cocoa powder. Next, roll each truffle in finely chopped toasted hazelnuts. Make sure they are evenly coated. You can also dust some truffles with cocoa powder for extra flavor. Place the truffles on a baking sheet lined with parchment paper. Return them to the fridge until you are ready to serve.
Tips & Tricks
Achieving the Perfect Texture
The quality of chocolate is key for great truffles. Use dark chocolate chips with at least 70% cocoa. This gives the truffles a rich taste. Always check the label for pure cocoa content. Good chocolate makes a big difference.
Temperature control is also crucial. Heat the cream until it simmers. Do not let it boil. Boiling can scorch the cream. After heating, pour it over the chocolate and let it sit. This step allows the chocolate to melt smoothly. Stir gently for a silky finish.
Truffle Coating Techniques
When rolling the truffles, prevent sticking by dusting your hands. Use cocoa powder lightly on your palms. This simple tip helps keep your hands clean.
You can also try different coatings. Instead of hazelnuts, use cocoa powder for a classic look. Try rolling in shredded coconut or crushed nuts for fun variations. Each coating adds a new layer of flavor.
Presentation Ideas
For serving, use a decorative platter. Arrange the truffles neatly for a stunning display. You can also put them in a cute gift box. This makes them perfect for sharing.
Garnish the platter with extra chopped hazelnuts and cocoa powder. This adds beauty and invites guests to enjoy. A simple touch like this makes your truffles look even more tempting.
Pro Tips
- Use Quality Chocolate: Opt for high-quality dark chocolate with at least 70% cocoa for a rich flavor that elevates your truffles.
- Chill for Best Texture: Ensure the ganache is properly chilled before rolling. This will make it easier to form smooth, round truffles.
- Experiment with Coatings: Beyond hazelnuts and cocoa powder, try rolling your truffles in crushed freeze-dried fruits or coconut for unique flavors and textures.
- Make Ahead: These truffles can be made in advance and stored in the refrigerator for up to a week, making them perfect for parties or gifts.
Variations
Vegan Chocolate Hazelnut Truffles
You can easily make these truffles vegan. To do this, swap the heavy cream with full-fat coconut milk. This change keeps the texture rich and creamy. Use dairy-free chocolate chips instead of regular dark chocolate chips. Brands like Enjoy Life or Hu Chocolate work well. For the hazelnut spread, look for vegan options like Justin’s or Nutiva. These simple swaps create a delightful treat that everyone can enjoy.
Gluten-Free Versions
To ensure your truffles are gluten-free, check all your ingredients. Most dark chocolate chips are gluten-free, but always read labels. Use cocoa powder for dusting that is marked gluten-free. When rolling in hazelnuts, make sure they are pure and have not been processed with gluten-containing items. By following these tips, you can create a safe and delicious treat for those with gluten sensitivities.
Flavor Additions
Want to jazz up your truffles? You can add different flavors. A splash of almond extract gives a lovely twist. Or try a pinch of cinnamon for warmth. For a coffee kick, mix in instant espresso powder. These flavor additions make your truffles unique and fun. Experimenting with flavors can lead to new favorites!
Storage Info
Best Practices for Storing Truffles
To keep your chocolate hazelnut truffles fresh, store them in the fridge. Use an airtight container to prevent them from absorbing other smells. This keeps them tasty and safe.
For long-term storage, you can freeze the truffles. Just place them in a single layer on a baking sheet. Freeze until firm, then transfer them to a freezer-safe bag. This way, they stay safe for up to three months.
Shelf Life
Homemade chocolate hazelnut truffles can last about a week in the fridge. If stored properly, they stay fresh and delicious.
Watch for signs that the truffles are no longer good. If you see any mold or an off smell, it’s best to throw them away. You want to enjoy the best flavor and texture.
Freezing Truffles
To freeze truffles, first, chill them in the fridge until firm. Then, follow these steps:
– Place truffles on a baking sheet lined with parchment paper.
– Freeze them for about one hour.
– Once firm, transfer the truffles to a freezer bag.
When ready to eat, just take them out of the freezer. Let them sit at room temperature for 15 to 30 minutes before serving. This helps regain their smooth texture. Enjoy your truffles anytime!
FAQs
How long do homemade chocolate hazelnut truffles last?
Homemade chocolate hazelnut truffles can last about one week in the fridge. To keep them fresh, store your truffles in an airtight container. If you want to keep them longer, you can freeze them. They will last up to three months in the freezer. Just remember to let them thaw in the fridge before serving.
Can I use milk chocolate instead of dark chocolate?
Yes, you can use milk chocolate instead of dark chocolate. However, this will change the flavor and texture. Milk chocolate is sweeter and creamier than dark chocolate. This means your truffles will taste less rich. The texture may also be softer. If you love a sweeter treat, milk chocolate is a great choice.
Where can I buy chocolate hazelnut truffles?
You can find chocolate hazelnut truffles at many stores. Look in specialty chocolate shops for high-quality options. Some bakeries also sell them. If you prefer online shopping, websites like Amazon or gourmet food sites offer a variety of truffles. Always check customer reviews to ensure quality.
You now have a complete guide to making delicious chocolate hazelnut truffles. We covered the key ingredients, from dark chocolate to hazelnut spread. You learned step-by-step instructions, tips for perfect textures, and variations like vegan options. Finally, we discussed how to store and preserve your truffles.
Enjoy creating these treats! They’ll impress anyone who tries them. Happy truffle-makin