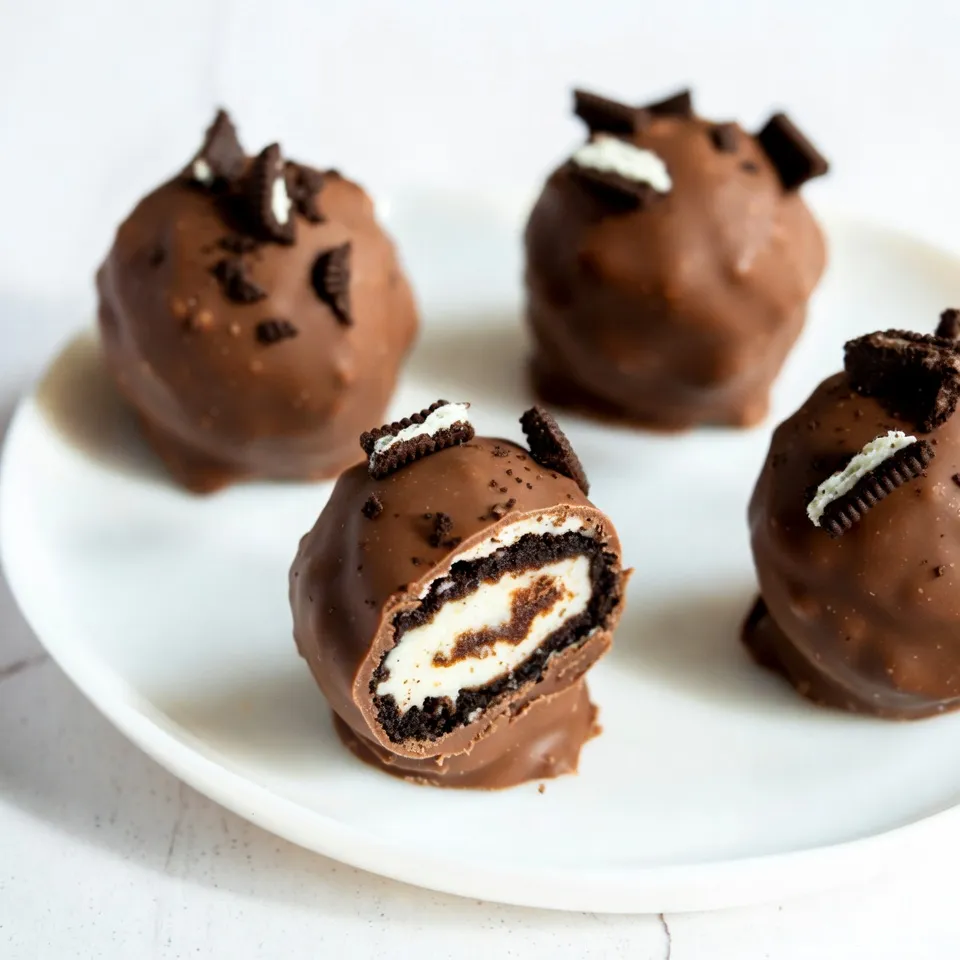
If you’re craving a quick and tasty treat, you’re in the right place! Chocolate Covered Oreo Truffles are simple to make and taste amazing. With just a few ingredients, you can impress your friends or satisfy any sweet tooth. In this post, I’ll share easy steps and tips to create these decadent bites. Let’s get started on making your new favorite dessert!
Why I Love This Recipe
- Easy to Make: This recipe requires minimal ingredients and simple steps, making it perfect for both novice and experienced bakers.
- Decadent Flavor: The combination of rich chocolate and creamy cream cheese creates a deliciously indulgent treat.
- Customizable: You can easily add your favorite toppings or mix-ins, like nuts or flavored extracts, to make these truffles uniquely yours.
- Great for Gifting: These truffles not only look beautiful but also make a delightful gift for any occasion, wrapped up in a decorative box.
Ingredients
Main Ingredients List
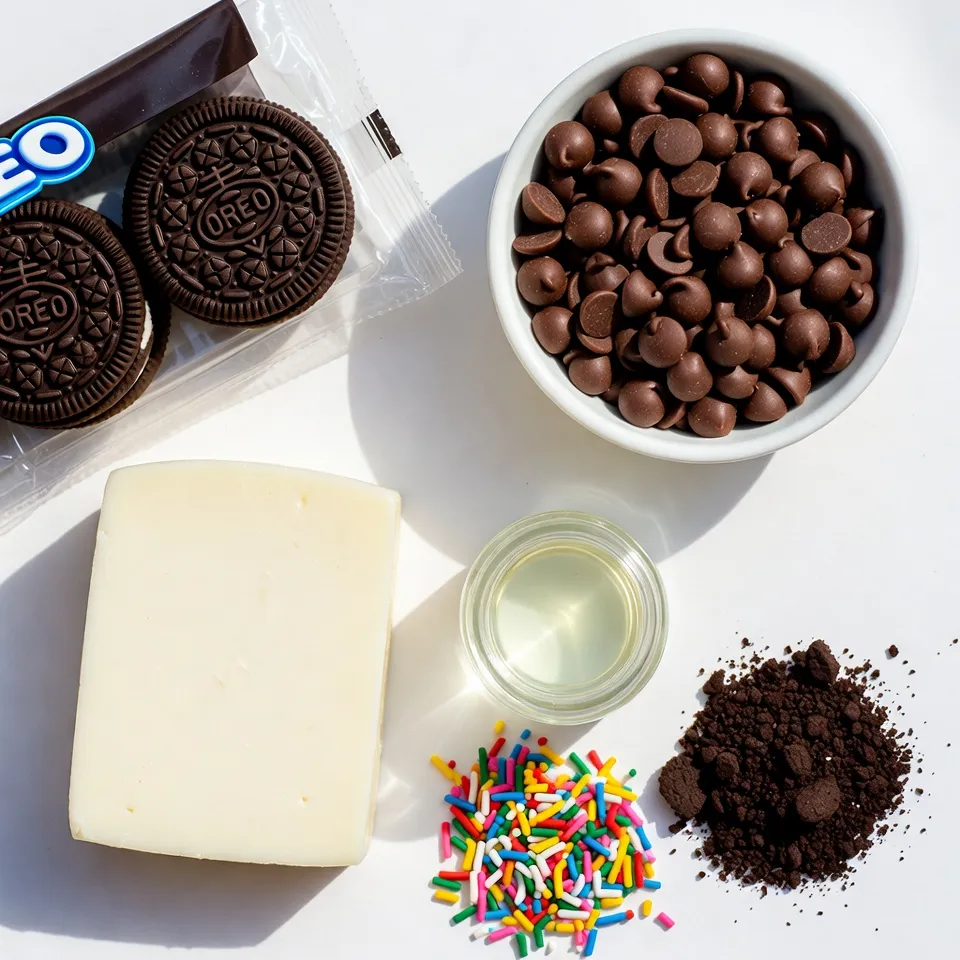
– 1 package (14.3 oz) Oreo cookies
– 8 oz cream cheese, softened
– 1 cup semi-sweet chocolate chips
– 1 tablespoon coconut oil (or vegetable oil)
Optional Toppings
– Crushed Oreos
– Colorful rainbow sprinkles
Recommended Tools
– Food processor or rolling pin
– Large mixing bowl
– Baking sheet
– Parchment paper
– Microwave-safe bowl
– Fork
Step-by-Step Instructions
Crushing the Oreos
Start by placing the Oreo cookies into a food processor. Pulse them until they turn into fine crumbs. If you do not have a food processor, put the cookies in a resealable bag. Use a rolling pin to crush them until they are sandy and fine.
Mixing the Ingredients
Next, grab a large mixing bowl. Combine the crushed Oreos with the softened cream cheese. Use a spatula or your hands to mix until it forms a dough-like texture. Make sure the mixture holds together well.
Shaping and Chilling the Truffles
Now, take small portions of the Oreo-cream cheese mix. Roll them into balls about one inch in diameter. Place the truffles on a baking sheet lined with parchment paper. Once done, chill them in the fridge for about 30 minutes. This helps them firm up and makes coating easier.
Melting and Coating the Truffles
For the chocolate coating, use a microwave-safe bowl. Combine the semi-sweet chocolate chips with coconut oil. Microwave in 30-second intervals, stirring well each time, until it is smooth. Then, use a fork to dip each chilled truffle into the melted chocolate. Make sure they are fully coated. Let any excess chocolate drip back into the bowl.
Decorating the Truffles
While the chocolate coating is still wet, add your decorations. Sprinkle crushed Oreos or colorful rainbow sprinkles on top. This adds a fun and festive touch to your treats.
Final Chilling
Finally, return the baking sheet with truffles to the fridge. Chill them for another 30 minutes until the chocolate is firm to the touch. Enjoy your delicious chocolate-covered Oreo truffles!
Tips & Tricks
Achieving the Perfect Texture
To get the right texture for your truffles, use room temperature cream cheese. This helps it blend well with the crushed Oreos. If the mixture feels too dry, add a bit more cream cheese. If it is too wet, add more crushed Oreos. The mixture should be smooth and easy to roll into balls.
Chocolate Melting Techniques
Melt the chocolate slowly. I recommend using a microwave-safe bowl. Heat the chocolate chips in 30-second bursts. Stir after each burst until it’s smooth. The coconut oil makes the chocolate shiny and helps it set better. Avoid overheating, as this can make the chocolate grainy.
Storing and Serving Suggestions
Store your truffles in an airtight container in the fridge. They stay fresh for up to a week. For a fun touch, serve them in colorful cupcake liners. If you’re gifting them, a decorative box makes a lovely presentation. You can also freeze the truffles if you want to keep them longer. Just remember to let them thaw in the fridge before serving.
Pro Tips
- Chill for Best Texture: Ensure your truffles are well chilled before coating them in chocolate. This prevents them from melting and losing their shape during the dipping process.
- Quality Chocolate Matters: Use high-quality chocolate for coating. It not only enhances the flavor but also helps achieve a smooth and shiny finish on your truffles.
- Experiment with Flavors: Feel free to add flavor extracts like vanilla or mint to the cream cheese mixture for a unique twist on your truffles.
- Storage Tips: Store your truffles in an airtight container in the refrigerator for up to a week for optimal freshness.
Variations
Different Chocolate Coatings
You can change up the chocolate coating for your truffles. Use white chocolate for a sweet twist. For a dark chocolate option, go for bittersweet chocolate to add depth. You can also try using colored candy melts for fun visuals. They give a playful look, especially for parties. Experiment with different flavors, like mint or orange, by using flavored chocolate.
Alternative Fillings
While the classic filling is great, you can mix things up. Try peanut butter or cream cheese frosting for a new taste. For a fruity touch, add crushed freeze-dried strawberries to the cream cheese mix. You can even use different cookies like Golden Oreos or chocolate mint cookies. This opens up a world of flavor options for you to explore.
Flavor Enhancements
Adding flavors can make your truffles even better. A dash of vanilla extract lifts the taste. You can also add a pinch of salt to balance the sweetness. Try mixing in some espresso powder for a coffee kick. For a festive touch, a splash of peppermint extract makes a great holiday treat. These simple changes can take your truffles to the next level.
Storage Info
Best Storage Practices
To keep your chocolate-covered Oreo truffles fresh, store them in an airtight container. This helps prevent them from drying out or absorbing other odors in your fridge. Line the container with parchment paper to keep them from sticking together. Place a layer of truffles, then another piece of parchment, and continue layering until you reach the top.
Shelf Life of Truffles
When stored properly in the fridge, these truffles last about one week. If you want to enjoy them longer, consider freezing them. The chocolate coating helps keep the truffles fresh and tasty. Just remember that the texture may change slightly after freezing.
Freezing Tips
To freeze your truffles, first chill them in the fridge until firm. Then, place them on a baking sheet and freeze until solid, about one hour. Once frozen, transfer them to an airtight container or a resealable bag. Be sure to label the bag with the date. You can store them in the freezer for up to three months. When you’re ready to eat them, simply take out the desired amount and let them thaw in the fridge. This way, you can enjoy a tasty treat anytime!
FAQs
Can I use other cookies besides Oreos?
Yes, you can use other cookies. Try chocolate wafers or graham crackers. Each will change the flavor. Just crush them like you do with Oreos. The cream cheese still binds them well. Experiment to find your favorite blend!
How can I make these truffles vegan?
To make vegan truffles, swap the cream cheese for a dairy-free alternative. Use cashew cream or vegan cream cheese. For chocolate, choose dairy-free chocolate chips. Check the labels to ensure they fit your needs. Enjoy a tasty vegan treat!
What is the best way to melt chocolate?
The best way to melt chocolate is with a microwave. Place chocolate chips in a bowl. Heat in 30-second bursts, stirring in between. This way, the chocolate melts evenly. You can also use a double boiler if you prefer.
How do I keep the truffles from melting?
Keep truffles in the fridge until serving. Use a cool, dry place. If it’s hot, chill them right before serving. Use high-quality chocolate for a firmer coating. These tips help maintain their shape and texture.
How many truffles does this recipe make?
This recipe makes about 20 truffles. The actual number depends on the size you roll them. If you make smaller truffles, you could get more. Enjoy sharing or saving some for later!
You now have all the steps to make delicious truffles. We covered the main ingredients, optional toppings, and the tools you’ll need. I shared tips to achieve the perfect texture and ways to store your treats. Plus, we explored fun variations to try.
In conclusion, these truffles are easy and fun to make. With practice, you can impress anyone with your skills. Enjoy crafting your own tasty delight